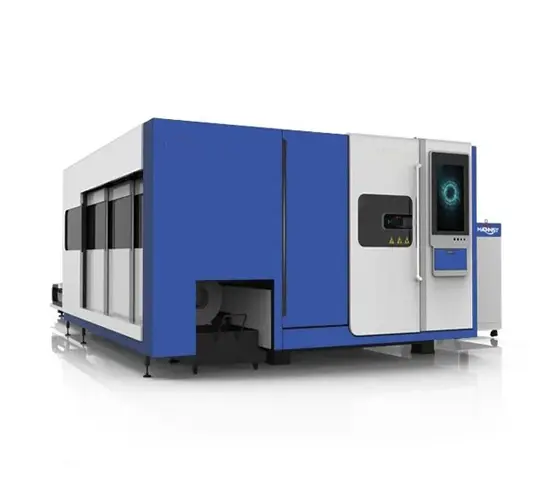
Laser cutters are powerful tools that use a focused beam of monochromatic light to precisely cut through various materials. Achieving the perfect cut requires balancing two critical factors: cutting speed and power. These variables are influenced by material type, thickness, and the laser's characteristics, making it essential to fine-tune settings for optimal results. This guide explores the differences between laser cutter speed and power, their impact on cutting performance, and practical tips for determining the ideal settings to enhance efficiency and quality in your projects.
What Is Laser Cutting Speed?
Laser cutting speed refers to the rate at which a laser moves through a material, typically measured in units like inches per minute (ipm) or millimeters per second. This speed is affected by several factors, including the material's type and thickness, the width of the cut, and the laser's power output. Thicker materials or wider cuts generally require slower speeds, as do scenarios with lower laser power. Materials with high thermal conductivity, such as metals, dissipate heat quickly, necessitating more power and often slower speeds to achieve a clean cut, while less conductive materials may allow for faster cutting. The speed of a laser cutter significantly impacts both the quality and efficiency of the cut. If the speed is too high, the laser may fail to cut through the material completely, leaving incomplete or uneven results. Conversely, moving too slowly can cause excessive heat buildup, burning the edges and compromising the finish. In a business context, slower speeds also reduce productivity, making it critical to find the optimal speed for each job to balance quality and output.
How to Determine the Right Cutting Speed
To identify the ideal laser cutting speed, start by consulting a laser cutting speed chart tailored to the material type, thickness, and laser type. These charts provide recommended starting points for speed settings. Next, conduct a test on a scrap piece of the same material and thickness. Cut a series of 11 squares, incrementally increasing the speed for each, with the middle square set to the chart's recommended speed. Evaluate the results to find the range of speeds that produce clean, complete cuts without burnt edges, ensuring the best performance for your specific application.
Benefits of Using a Speed Chart
A laser cutting speed chart is an invaluable tool for streamlining the setup process. Without it, operators might resort to time-consuming trial-and-error methods, wasting material and effort. By providing a reliable starting point, speed charts save time and resources, allowing users to quickly zero in on the optimal settings for their material and laser setup.
Speed Settings for Common Materials
For cutting 1/10-inch thick plywood with a 10 W diode laser, a speed of approximately 15.7 ipm is recommended as a starting point. This speed may need adjustment for thicker, denser wood or lower-powered lasers, which require slower speeds, while thinner or less dense wood may allow for faster cutting. For 1/10-inch thick aluminum using a 200 W CO2 laser, a speed of around 59 ipm is suggested. Highly conductive or thicker metals typically require slower speeds to ensure effective cutting, and testing on scrap material is essential to confirm the optimal setting.
What Is Laser Cutting Power?
Understanding Laser Power
Laser cutting power refers to the amount of light energy delivered by the laser per unit of time, distinct from power density, which measures energy per unit area. Higher power enables faster cutting or the ability to process thicker materials. However, excessive power can lead to undesirable effects, such as charring or burning at the cut edges, which affects the quality of the finish.
The Role of Power in Laser Cutting
Power is a critical variable in laser cutting, directly influencing the speed and depth of the cut. Insufficient power may result in incomplete cuts, while excessive power can damage the material by causing burns or discoloration. Properly calibrating the power setting ensures clean cuts and maintains the material's integrity, making it a key factor in achieving high-quality results.
How to Determine the Right Power Setting
To find the optimal laser power, begin with a laser cutting power chart that specifies recommended settings based on material type, thickness, and desired cutting speed. Test these settings by cutting 11 squares on a scrap piece of the same material, with the middle square set to the recommended power and the others incrementally adjusted. Analyze the results to identify the power range that delivers complete cuts with clean, unburned edges, ensuring the best outcome for your project.
Advantages of Power Charts
Laser cutting power charts are essential for efficiently selecting the appropriate power settings. They eliminate the guesswork that could otherwise lead to material waste and prolonged setup times. While charts provide a solid foundation, testing on scrap material is still necessary to verify that the recommended power settings produce the desired results for your specific application.
Power Settings for Common Materials
For cutting wood, CO2 lasers with power ratings between 150 W and 800 W are ideal, capable of handling wood up to 3/4-inch thick. The exact power depends on the wood's type and thickness, with harder or thicker wood requiring higher power settings. For metals, CO2 lasers typically need over 1 kW of power, with adjustments based on material thickness and thermal conductivity. Highly conductive metals, like aluminum, demand more power to achieve clean cuts. Always use a power chart as a starting point and validate settings with a test cut on scrap material.
How Speed and Power Interact in Laser Cutting
Impact on Cut Quality and Productivity
The interplay between laser cutting speed and power directly affects both the quality of the cut and the machine's productivity. Higher power allows for faster cutting speeds, but there's a limit beyond which the material may char or burn. Speed determines the laser's contact time with the material—too fast, and the cut may be incomplete; too slow, and the edges may burn. In business applications, optimizing this balance is crucial to maintaining high productivity without sacrificing quality.
Does Speed Affect Cut Accuracy?
Adjusting laser cutting speed does not directly impact the accuracy of the cut's path, as accuracy is primarily determined by the machine's precision and control systems. However, speed influences the energy delivered to the material. Higher speeds reduce energy exposure, potentially leading to shallow cuts, while slower speeds increase exposure, risking burns or deeper-than-intended cuts. The key is to find a speed that ensures a clean, complete cut without compromising the design's precision.
Influence of Material Thickness
Material type and thickness are the primary determinants of laser cutting speed and power. For a fixed laser power, thicker materials require slower speeds to ensure sufficient energy for cutting, meaning speed and thickness are inversely proportional. Similarly, materials with higher thermal conductivity or greater thickness demand higher power settings to achieve effective cuts, highlighting the need for tailored settings for each job.
Specific Settings for Acrylic
When cutting 1/6-inch thick acrylic with a 5.6 W diode laser, a speed of approximately 6 ipm is recommended. Thicker acrylic or lower-powered lasers require slower speeds to achieve clean cuts, while thinner materials or higher power may allow for faster speeds. Testing on scrap acrylic is essential to confirm the optimal speed and power combination.
Challenges in Setting Speed and Power
Finding the perfect laser cutting speed and power settings can be complex due to the variability of materials and laser types. Using a chart with predetermined settings is a practical starting point, but testing on scrap material of the same type and thickness is critical to fine-tune the parameters. This process ensures cuts are complete, clean, and free of burns, optimizing both quality and efficiency.
Speed and Power in Laser Engraving
Speed and power settings are equally important in laser engraving, where a laser beam melts away surface layers to create designs. If the speed is too high, the engraving may be too shallow, resulting in a faint or unclear design. Conversely, if the speed is too slow, the laser may burn the material, damaging the surface. Balancing these settings is essential to achieve precise, high-quality engravings that meet design specifications.
 English
 日本語
日本語 한국어
한국어 français
 Deutsch
 Español
 русский
 Türkçe
 português
 العربية
 Polska
 हिंदी
हिंदी Indonesia


